ueditor 1.2.6 使用方法说明
以下文本是以php版本为例的,对ueditor 1.2.6的使用方法进行了详细的说明介绍,需要的朋友可以过来参考下本文以php版本为例:
文件下载:http://ueditor.baidu.com/website/download.html
还可以自己先定义内容,然后下载,这样可以帮助我们精简不少东西。
以本地php环境为例,现在www目录下建立一个app目录作为测试目录,然后将下载的ueditor文件夹解压到app文件夹下。
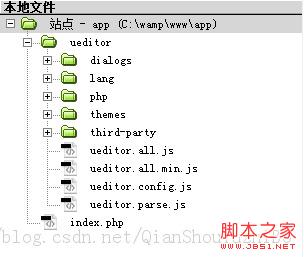
然后,在app文件夹下建立一个index.php文件。
然后输入以下代码:
<!DOCTYPE html>
<html>
<head>
<title>编辑器完整版实例</title>
<meta http-equiv="Content-Type" content="text/html; charset=UTF-8">
<script type="text/javascript" src="./ueditor/ueditor.config.js"></script>
<script type="text/javascript" src="./ueditor/ueditor.all.js"></script>
<link rel="stylesheet" href="./ueditor/themes/default/css/ueditor.css"/>
</head>
<body>
<h2>UEditor提交示例</h2>
<form id="form" method="post" target="_blank">
<script type="text/plain" id="myEditor" name="myEditor">
<p>欢迎使用UEditor!</p>
</script>
<input type="submit" value="通过input的submit提交">
</form>
<p>
从1.2.6开始,会自动同步数据无需再手动调用sync方法
<button onclick="document.getElementById('form').submit()">通过js调用submit提交</button>
</p>
<script type="text/javascript">
var editor_a = UE.getEditor('myEditor',{initialFrameHeight:500});
//--自动切换提交地址----
var doc=document,
version=editor_a.options.imageUrl||"php",
form=doc.getElementById("form");
form.action="./getContent.php";
</script>
</body>
</html>
然后再浏览器输入localhost/app/
就可以查看编辑器了;
然后会发现图片上传功能无法使用,需要打开ueditor.config.js
然后找到这一行代码:
var URL = window.UEDITOR_HOME_URL || (function(){
然后再这一行代码的上面加上这行代码:
window.UEDITOR_HOME_URL||"/app/ueditor/";

然后,刷新一下页面,图片上传功能就可以使用了。
ueditor的官方说明文档地址:http://ueditor.baidu.com/website/document.html
官方说明文档中的文件名有错误(应该是版本升级之后没有修改过来),请大家注意。
PHP之友评论